 |
| |
|
Indo Nikko’s status as
a global player in the bearings industry largely stems from its
manufacturing operations at Chakan, Pune. The facility is replete with
sophisticated machinery and features a cellular layout with an advanced
degree of automotive and computer controlled manufacturing technology.
The Indo Nikko quality practice is applied across the production line.
From raw materials to finished parts, to assembled units, to inspection,
to lubrication through to final product packaging. Surveillance units
including roving inspectors monitor the quality of all incoming raw
material and consumables. The incoming supplies of bearing steel and
components are subjected to the latest in stringent chemical and
metallurgical tests for both micro and macro cleanliness. In addition
the etch test, the crack detection test and the hardness test among
others, ensure dependable quality of Indo Nikko products. All gauges and
masters are periodically calibrated to maintain consistent quality.
Indo Nikko rolls out the best.
|
 |
| We use the best
equipments to manufacture our bearings . |
|
-
FACE / OD GRINDERS
BLANCHARD surface grinder (USA)
TOS Double disk grinder (Czechoslovakia)
WMW mikrosa center less grinders (Germany)
-
EXTERNAL GRINDERS
WMW AGL 50 (Germany)
WMW AGL 125 (Germany)
FAMIR (Italy)
-
HARDNESS TESTING MACHINE
ROCKWELL (Germany)
|
-
INTERNAL GRINDERS
BWF SI 4 (Germany)
BWF SIW 3B (Germany)
WMW SIW 3U (Germany)
WMW SIAG 50 (Germany)
FAMIR (Italy)
-
SUPERFINISHING MACHINES
SUFINA (Germany)
GRIESHABERS (Germany)
WMW SZ W4 (Germany)
THIELANUS (Germany)
|
|
|
Indo Nikko makes
bearings from high carbon chromium SAE 52100 vacuum degassed steel. All
the components of bearing rings, balls and rollers are treated in a
controlled Nitrogen atmosphere in a GEC ALSTHOM Shakerer Hearth Furnace
with a continuous washing line and tempering furnace to realize maximum
metallurgical characteristics for bearing longevity enhancement.
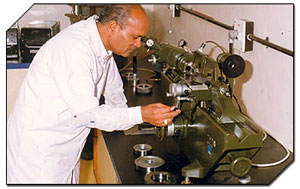
Indo Nikko boasts of one of the finest quality assurance laboratories in
the world. Our Chakan facility is equipped with world-renowned brands of
quality checking and assuring instruments and gauges:
ROUNDNESS is measured with a Talyrond machine from Taylor Hobson,
England.
SURFACE ROUGHNESS is measured on a Talysurf machine from Taylor
Hobson, England.
HARDNESS TESTING is measured on a Rockwell Hardness Tester from
Germany.
CALIBRATION of masters is carried out on a SIP machine from
Germany.
DIAL INDICATORS and Gauges are from CARL Zeiss & VEB of Germany.
|
At Indo Nikko Bearings Ltd., bearings are produced to tolerance
standards set by:
1. Angular Bearing Engineers Committee – ABEC
2. Anti-Friction Bearing Manufacturers Association – AFBMA
3. International Organization for Standardization – IOS
Good equipment is imperative to achieve quality in a precision product.
Indo Nikko’s installed base incorporates the best machines for bearing
manufacturing. These machines enable us to achieve the highest levels of
quality as:
1. They are CNC controlled.
2. Critical stage processes are controlled automatically by marposs
gauges.
3. The state-of-the-art cleaning system prevents dust or foreign
elements from contaminating the bearing components with 5-micron
filtration of all washing media.
4. Each workstation is equipped with measuring and controlling gauges
and instruments, to ensure that each component is confirmed for correct
tolerances before being passed on for a subsequent operation. |
|
|
|
RESEARCH & DEVELOPMENT
Indo Nikko has a full-fledged in-house R & D facility to design all
kinds of bearings and toolings. Bearing design is done on the latest CAD
& CAM software. Furthermore a complete engineering and research facility
solves intricate problems with expert advice on the design, development,
manufacturing, installation and maintenance of bearings. |
|
|
![]()
